Designing your siteYou'll actually design your site in Lightroom's web module, but note that you do not export your site from there. First stepsWhen designing your site you'll need to choose some images to use as place holders during the preview. These images will not form part of the site, and they'll not be exported when you publish the site; they're only used to allow you to create the look and feel of the site. Choose some images from your catalog, select a handful (4 or 5 will do), then go to the Web module and choose the plugin from the list of Web Engines at the top right. At this point it's best to tell Lightroom to use only the selected images rather than the entire filmstrip, lest Lightroom be slowed to a crawl as it attempts to render the previews. You'll find this option in the Toolbar just above the fimlstrip (press 'T' if you can't see the toolbar): Navigating the siteUsing the navigation bar you can browse the site by visiting the various pages on the site such as the Gallery Index, Home page and Contact page. Viewing various gallery typesNote that the Gallery Index page uses the images that you've selected in the filmstrip to generate an example index page. By selecting different numbers of images you can see what the page will look like when there are more or less galleries. The example gallery index page will also contain a mix of galleries, gallery sets (or "categories"), password protected galleries and contact sheet galleries. Once again, these are just examples, but they also serve to allow you to adjust the setting for each of these views: 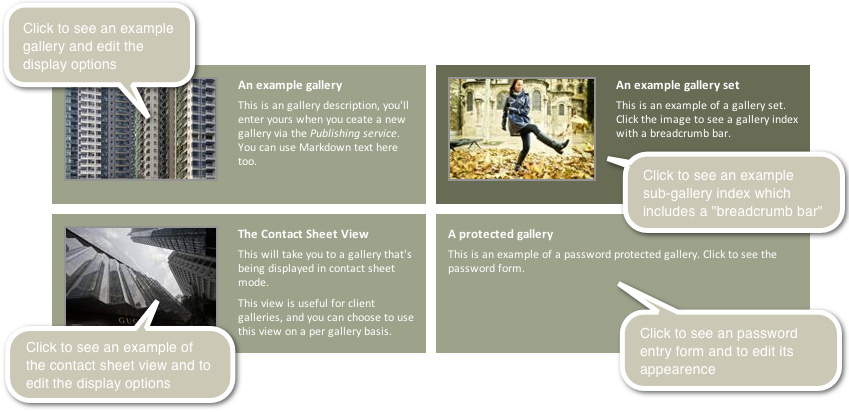
Look and feelWhen the plugin is installed it will also install some example templates that will allow you to get feel for the type of designs that are possible. You'll find these template listed on the left hand side. Here's an example (the list will vary from what you see here): 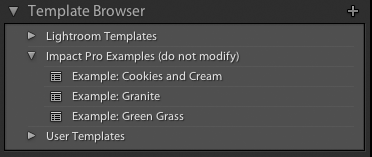 Click on the different examples to see the different designs. Note the "do not modify" comment. Beware that the plugin will delete this folder and install a more recent copy whenever it's updated, so any changes that you make here will be lost. If you wish to use a template then you should take a copy and place it in another folder. Once you've explored these examples you can take control of your own own design using the options on the right hand side — most of these options will be found in the Appearence panel. The options available will vary from plugin to plugin based on the design, and it's best to experiment — you can't break anything! Note that in order to reduce the number of options that are visible at any one time in the right hand column the plugin hides the options for various page types (gallery page, index page, contact page...) until they're actually displayed in the preview window. To reduce the clutter even further, we recommend that you use "Solo mode": right click on a Panel title and choose "Solo mode" - Lightroom will only open one panel at a time, and this greatly simplifies the task. 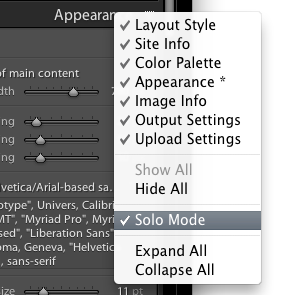 Page content and MarkdownMost pages on your site will include textual content. The Web Site Publisher Pro galleries are the first Lightroom galleries (and at the time of writing the only ones) to give you unprecedented control over your text by allowing you to use the Markdown format developped by John Gruber. By correctly formatting your text you can trivially add headings, paragraphs, links, images, lists, bold and italic text, etc. Advanced users may even insert snippets of HTML. Visit John's guide for some basic examples. Double clicking on the text on any page in the web module will allow you to see and modify the underlying Markdown text. If this doesn't work (it fails under some Windows configurations) then you can still modify the text from the right hand side — you'll find the text for each page under the Site info panel. IMPORTANT: To add newlines you'll need to type <option>-<return> on Mac or <ctrl>-<return> on Windows. Adding menu items and pagesThe menu items that appear in the navigation bar are defined in the "Appearence" panel. There are six available and for each one you may define its title, specify the destination page and choose whether or not to include it in the navigation bar 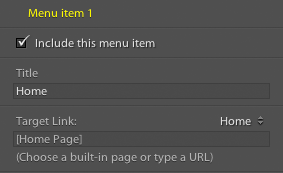 The destination page may be one of the gallery's own pages such (e.g. the Contact page), or you may enter a link to an external site — this may be useful if you have a blog hosted elsewhere, for example. The built-in pages include the Home page (the first page that the user sees), the Contact page, the Gallery Index page and three miscellaneous pages that you can use for any purpose (for example, you could add an "About" page or a "Link" page). The Contact pageThe Contact page gives you the option of creating a form for your visitors to fill in. For this to work a small program will need to be run on the server that takes the contents of the form and sends it to you by email. To this end, the plugin will by default generate this page in a special prgramming language called PHP that'll be run by your web host's server. There are however two caveats:
If, once you've exported your site, you see that the contact form either doesn't display or else doesn't function then there's another solution that won't have these problems — using the FormToEmail Remote service option (you'll find this in the Contact Page settings when designing your page in the Web Module). This will generate an HTML form, and FormToEmail Remote's servers will handle it and send the email for you. Note that you'll need to create and account with FormToEmail Remote, and that they offer both free and paying services. 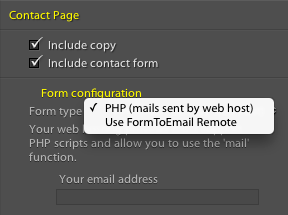 The disadvantage of the FormToEmail Remote option is that the user experience will be less integrated since the user's browser will be redirected to their remote servers. Saving your templateOnce you've designed your site you'll need to save the design as a template so that it can be accessed by the Publish Service. To do this, click the + button in the Template Brower panel that you'll find on the left of the screen. ExportingNow that you've designed your site and saved a template you're ready to export it...
|
